Galleries
My Model Ships - In The Making ...
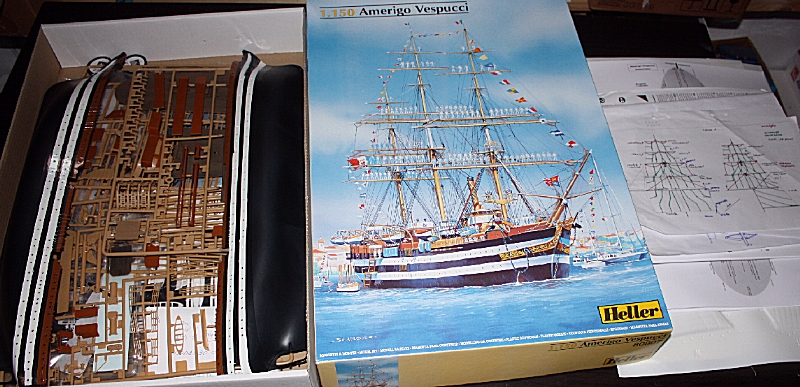
Heller - Amerigo Vespucci, 1:150 Scale
|
I had the hull halfs painted since long ago, but then - once more - my time was limited and I put the project on hold ...
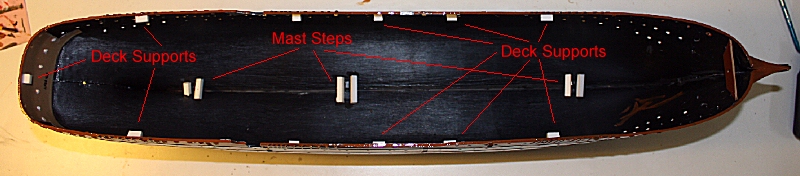
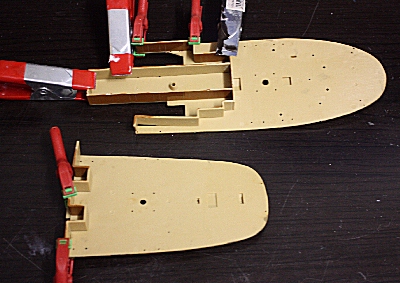
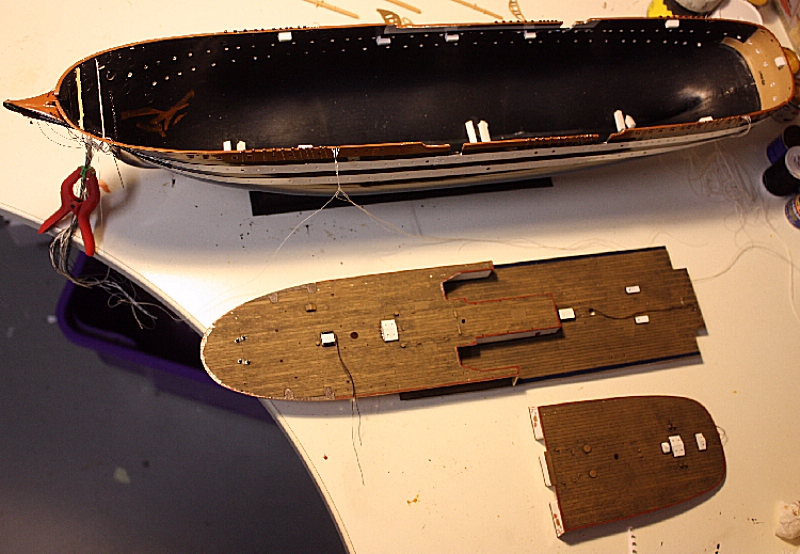
Making the HullOctober 2010: I eventually started over my favorite sailing ship of all: the Italian navy training ship Amerigo Vespucci. To glue the two hull halfs is of course very easy. But the stern part needs some attention already, because it does not really fit - yet another challange in plastic modelling ... Then I added some scratchwork: because the mast steps on the inside keel are not distictive enough (You would simply miss the hole when inserting the masts through the decks), I added some simple sprue cuts around the mast step holes; so I would "find" the them later much more easily when I insert the masts through the deck - because then I cannot see anymore inside.
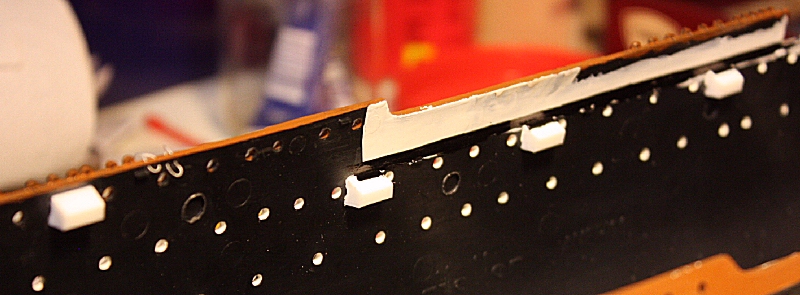
And I added some larger deck supports using the same used sprue parts (which are left-overs, very welcomed and suitable for such tasks). The supports moulded inside were not large enough for part fitting work:
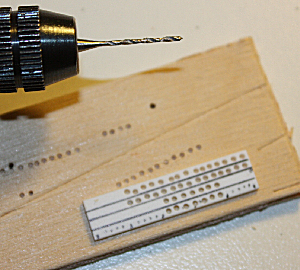
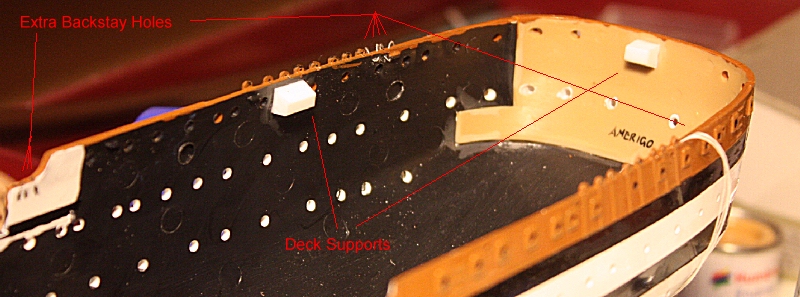
Also, as I found an error in the rigging plans, I bored some extra holes for additional backstays. Because the real Amerigo has more backstays than the plan indicates:
I needed to bore these extra backstay holes before making the decks, because otherwise there would be no way. The hull rails have some holes moulded, but they are not enough. So I took a fine boring machine ... and I already prepared the threads through the holes.
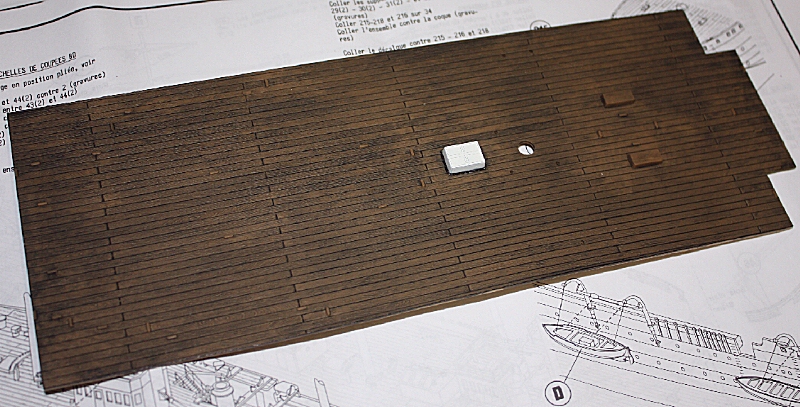
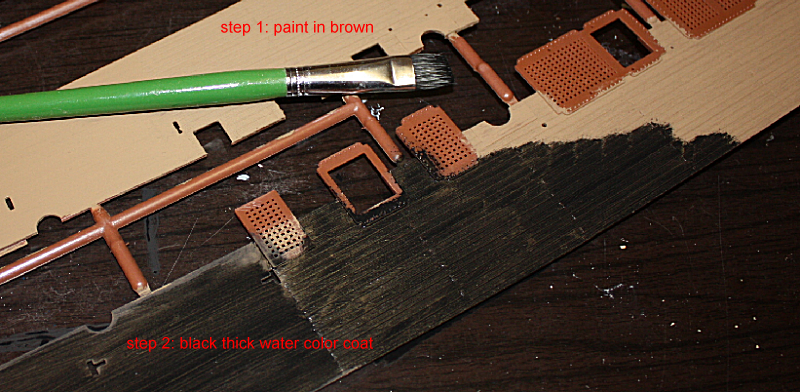
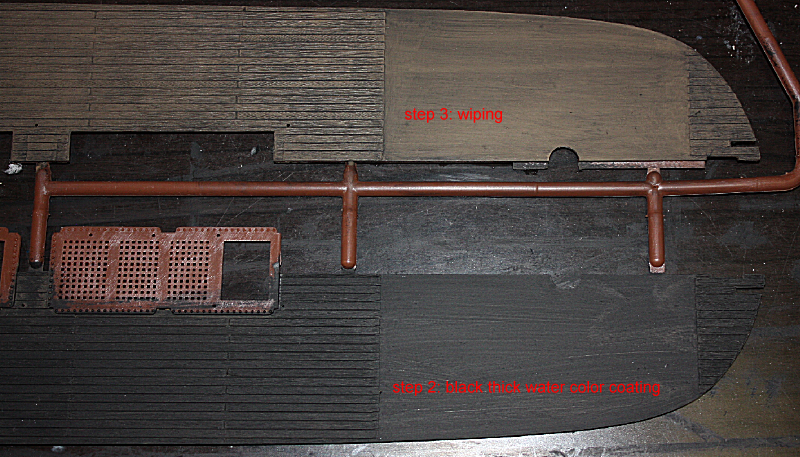
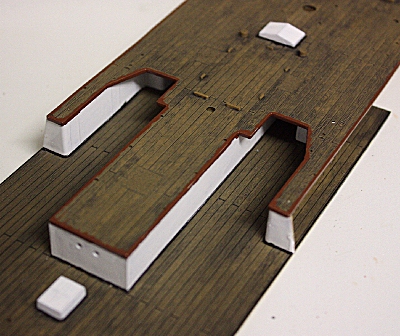
Making the DecksNovember 2010: I can start with the decks ... first step is painting. I want to look them like wooden ...
To make a plastic deck look wooden is rather easy: I did it many time for various kits.
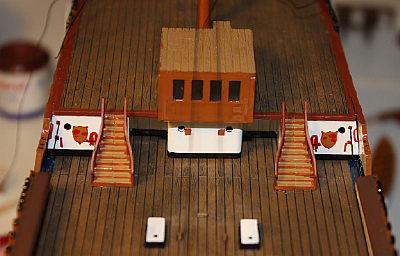
The following steps how to mount the 3 deck parts maybe subject for discussions, I connected forecastle and main deck before inserting them. The parts do not fit easily so this was a longer work with many steps in between. Letting dry the glue was time consuming. Just before it was "too late", I noticed that I had painted the accommodation walls between the decks wrongly in brown (as indicated in the plan) - the real ones are white (which I discovered after my visit to the ship, when I made over 500 photos )
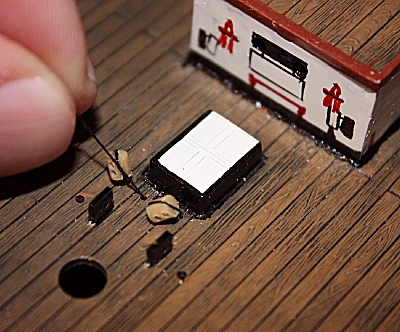
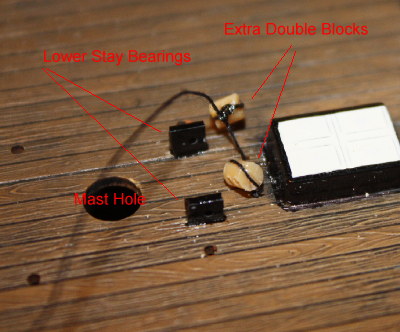
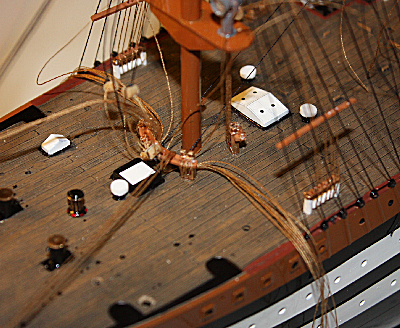
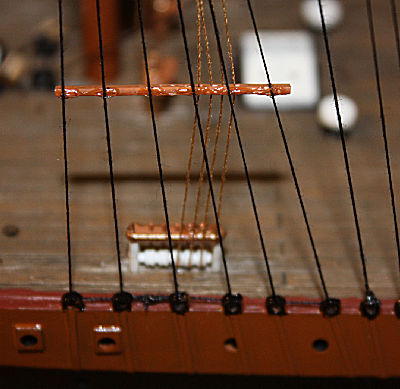
And I made a lot of fitting tests, as the mizzen deck does not fit. And I added some scratch work again: on the real Amerigo, two double blocks at the foot of all three masts take the lower topsail sheets. This detail is of course omitted in the kit delivered, so I add it: I take some sprue left-overs and make blocks. Then I bore two fine holes before the mast insert holes, and fix the blocks there. Yes, it is difficult ... when I fix the deck it is too late for that. (The real Amerigo is even more complicated around the mast, there are many rings on the deck to tie blocks on them as needed. In this scale, model rings are all too big, so I ommit them).
And the black lower stay bearings of steel, just under the bitts (almost invisible even in the real ship) I also added.
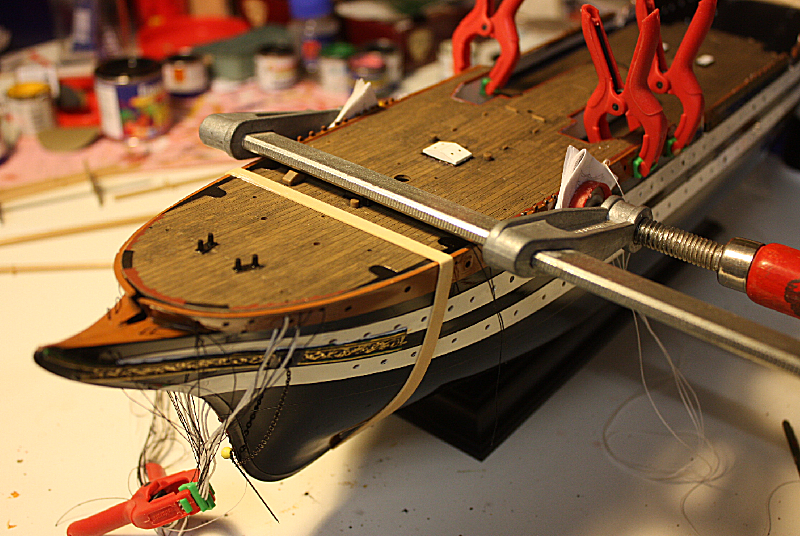
Any "scratch work" that needs to be done before fixing the decks takes a lot of time, planning and patience ... for instance, all the rigging for the bowsprit needed extra holes, too, so I had to redesign the entire standing rigging here first, and prepare all threads. But finally, after many tests and corrections, I can "marry" the hull with the deck: but the bad fitting of the parts needs some careful degree of "brute force" and glue ...
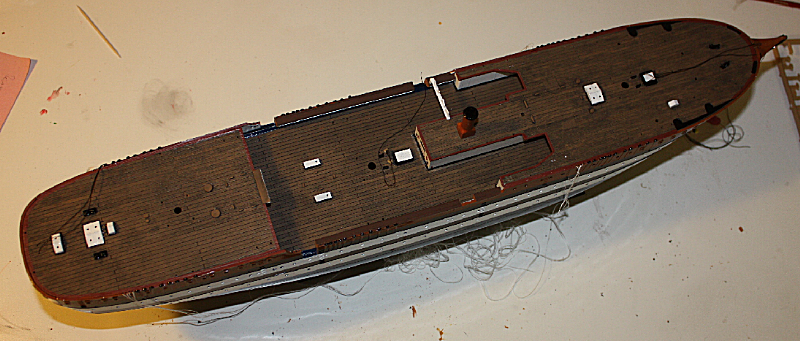
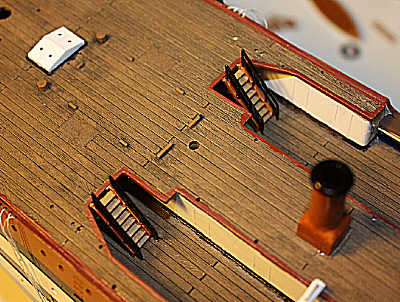
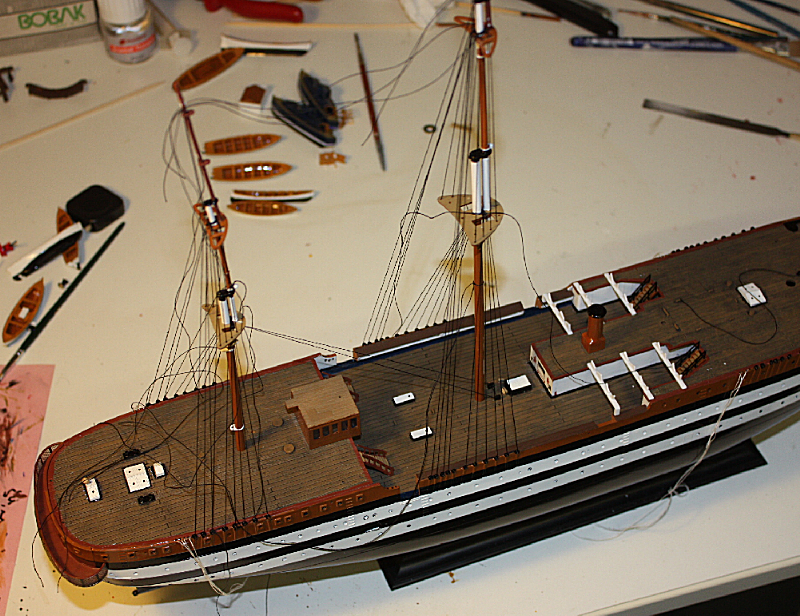
Preparing various Parts and the MastsDecember 2010: Stairways, Deck Houses, Boats, Bitts, and many other parts wait to be prepared ...
Also here, the Aft Rudder House is visible (not ready but gives an impression) The parts for the Aft Rudder House do also differ from the real Amerigo of today. Fortunately, the difference is not that big ... so I keep it as it is.
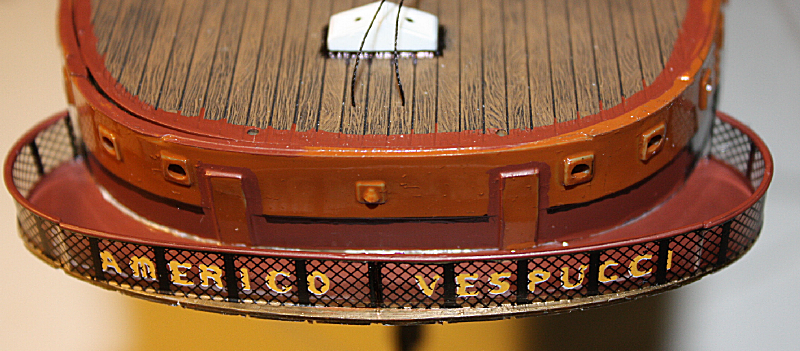
The stern gallery is some what tricky to build and to paint. But at least the "fence" is a decal.
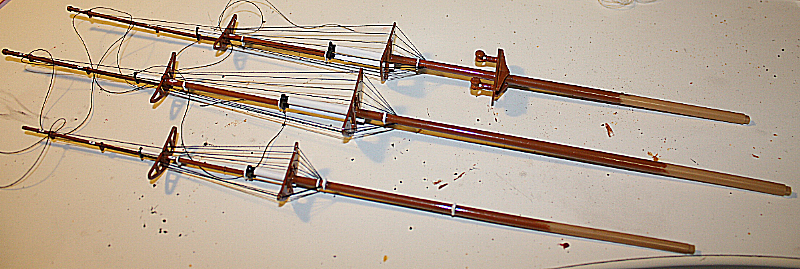
The mast parts are each two halfs, to be glued carefully (of course they should be straight and even as a result)
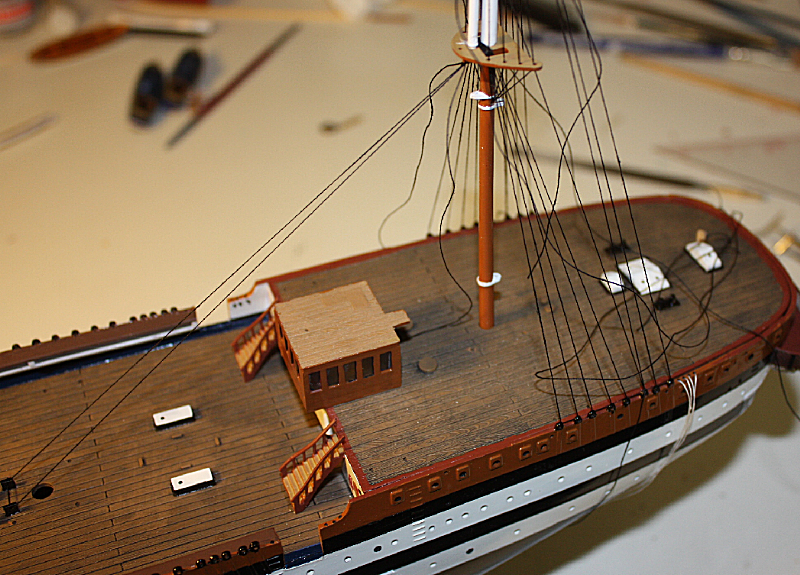
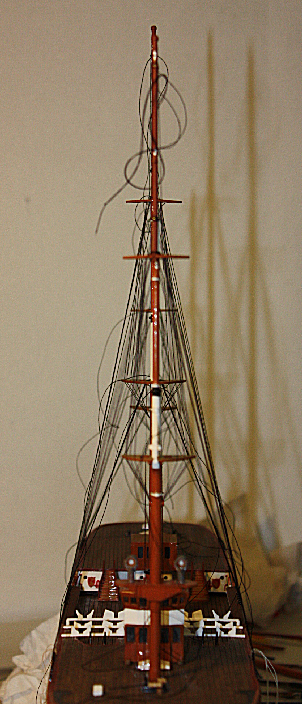
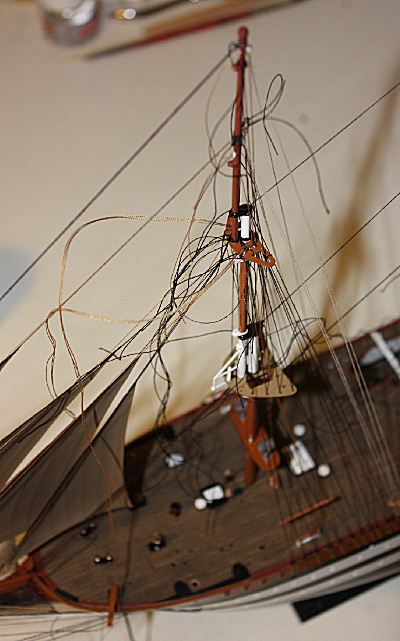
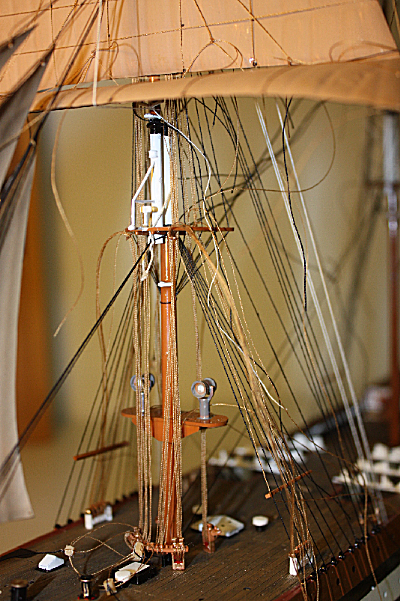
I studied the real rigging very thoroughly to prepare scratchwork on the masts. The rigging would be most visible, so I put most efforts on that. I prepared some of the standing rigging already here, before inserting the masts. I think at this step, the preparation of the upper shrouds is easier than on any other stage of modelling. Here I can bore holes as needed, whithout having to fear destroying my work by accident (the mini bore machine craves highest attention and carefulness!). The real shrouds are of wire, so I use black, thin, usual sewing thread to model them. If I would want 100% scale accuracy, then I would have to use hair, but that would be overdone ... but I did use hair to make the ratlines on the shrouds (by glueing them on the threads). Knotting those whould definitely be out of scope in 1:150. The Standing Rigging - Stays, Shrouds and BackstaysJanuary 2010: All masts and deck scratchworks prepared, now I can "step" the masts. I begin from the mizzen mast, because the lower stay (leading diagonally down forward, to the main mast foot) is best accessible that way. For the shrouds, I use one single thread to be looped up and down through all the holes, until I have all 5 shrouds on both sides. So it is a long thread indeed ... but that way, I can adapt the strain on the masts. The same method I use for the backstays. I loop through all "points" (where I prepared the holes) quite loosely at the beginning, and then I give it some strain - not too much of course. In the end, the stays (farward) and the shrouds and backstays (to the back sides) are in ballance, and if done carefully, the mast stands upright and fixed It is actually the same equation of strain forces that also applies to the real sailing ships. And it is astonishing, how stable so tiny pieces can be using simple sewing thread =)
Then comes the main mast, same methods applied. The main shrouds now cover the mizzen lower stay, now You can see why I work from the mizzen to the bow. The mizzen mast still bends visibly to the aft to some degree - because here I made no stays yet; because I need the main mast for them to be attached.
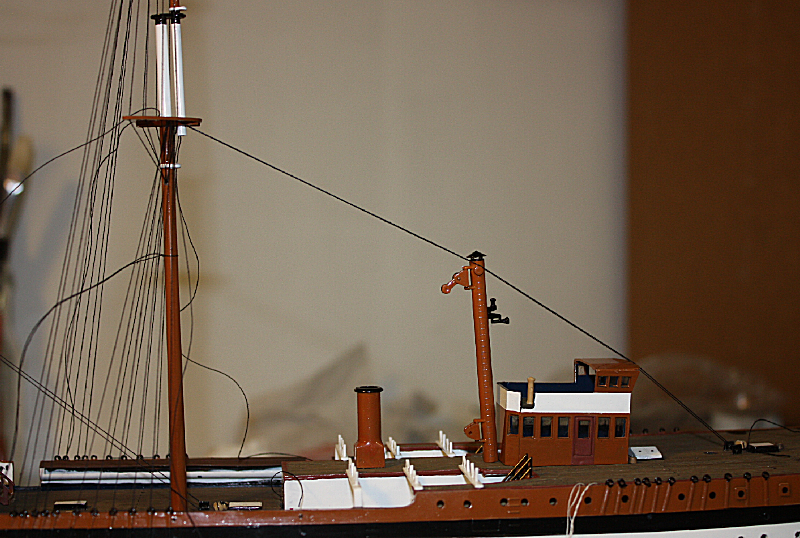
The main mast stay runs over a high "post" on deck, that later holds the boom.
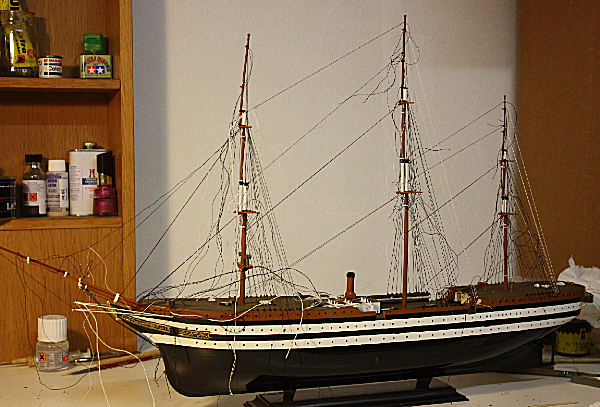
And the Fore Mast as done the same way as well. Alignment of the masts
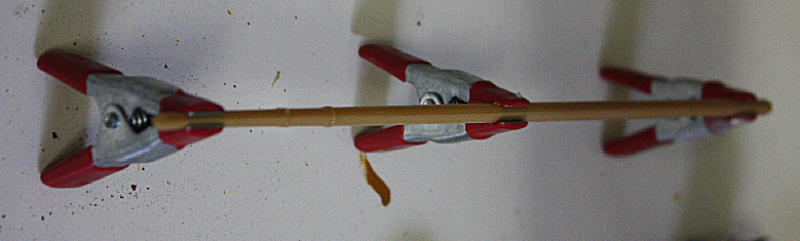
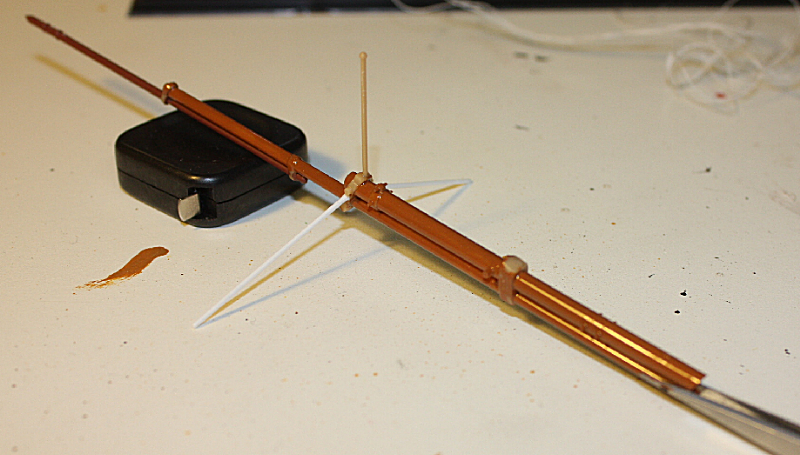
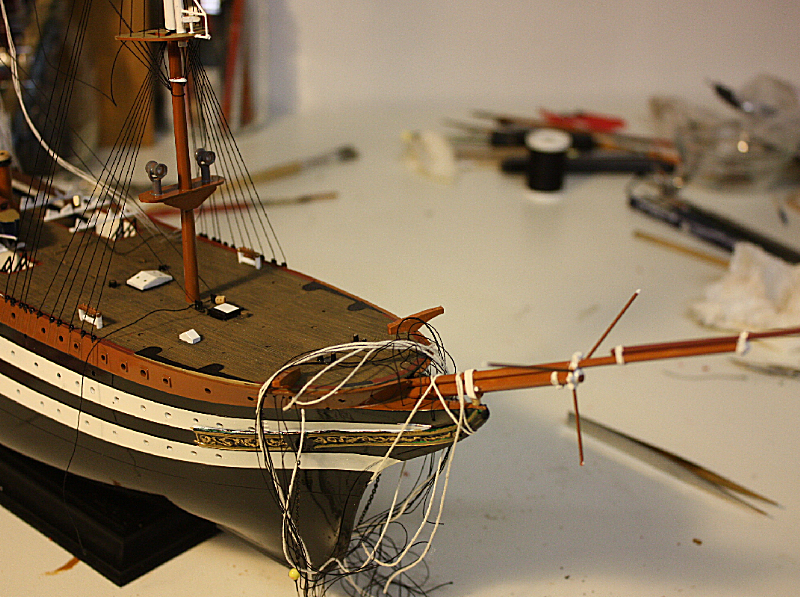
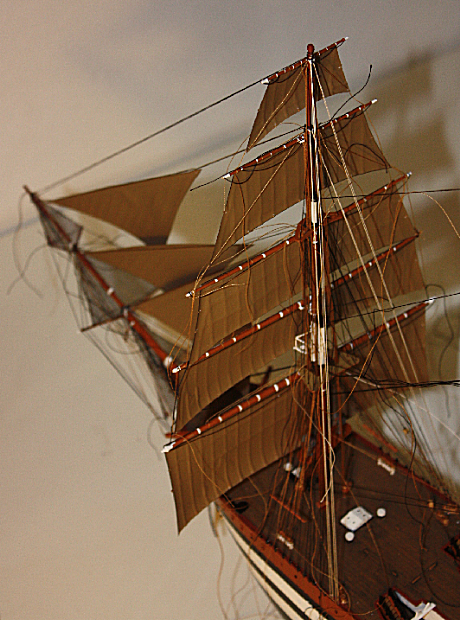
The BowspritThis is probably the most fragile part of all sailing ship models - it breaks first on an "accident". The bowsprit of the Amerigo is very special, long and thin, and it is somehat tricky to glue the tiny parts, as a preparation:
The Standing Rigging of the bowsprit of the Amerigo is also very special and complicated, many ropes attach to the hull or the fore deck. All threads are readily prepared. I use some thicker threads to imitate the chains of the real Amerigo. There are no such chains available 1n 1:150.
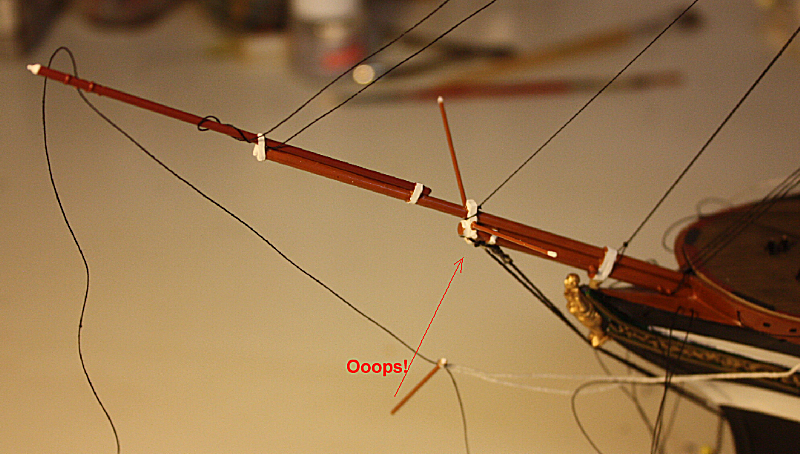
Then it is careful rigging, step by step. And - ooops! - I broke the dolphin striker of my bowsprit. Things like these simply happen in model making, even if You take utter care ... but this is exactly why I bored all holes before arranging the rigging. And in order to do so, I reconstructed the entire rigging on paper before I began anything.
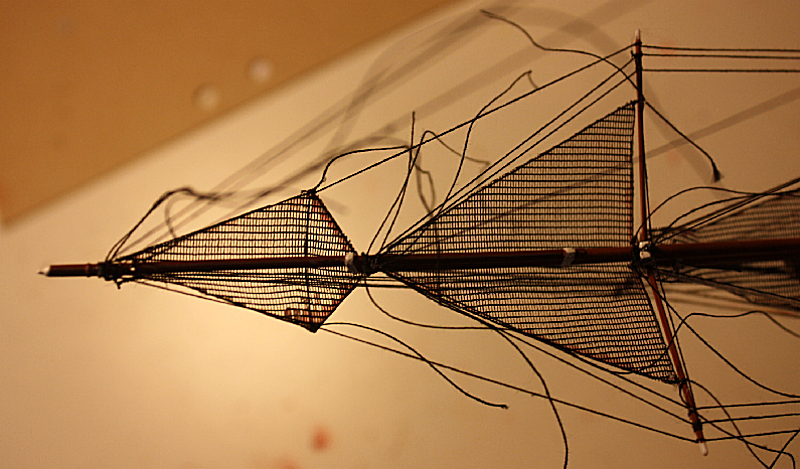
That can be fixed also ... that trains Your skills of improvisation and Your patience, of course =) After some hours, I was ready with it (whithout cleanup up all the thread ends yet), now came one of the difficult parts: the bowsprit nets.
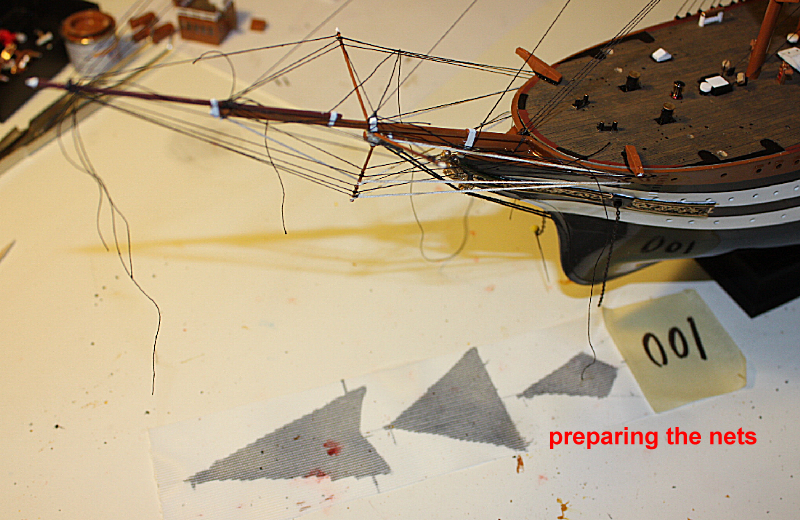
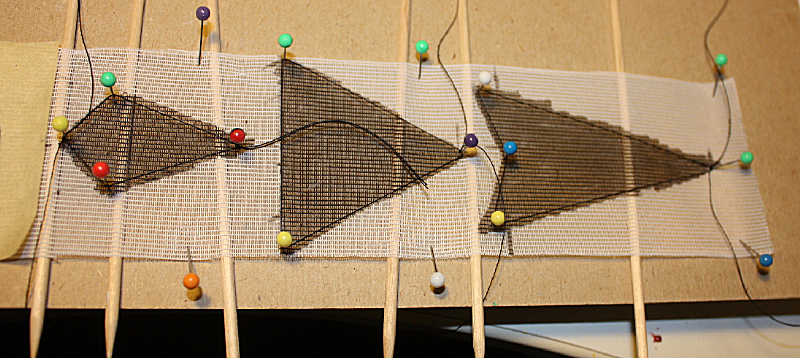
The kit plan tells You You should use the "rigging machine" and make a net of Your own. Of course You can do it, I hade some textile roles fitting exactly the purpose: it would not loosen and I would only need to make it black, and add the outer ropes, using glue.
Then I cut cut out all the three nets needed:
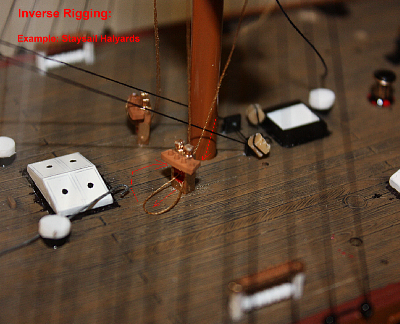
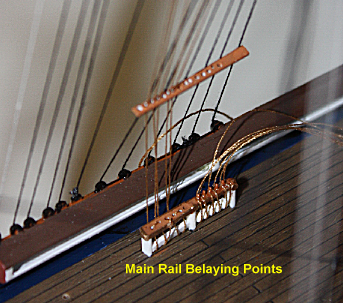
"Wait a minute! Why do You start rigging without having done the deck ready?"I did that with purpose: leaving out the boats and many small other things, including the deck houses, to the end of the process, because all those parts would make rigging very difficult indeed, when You can no longer access the "space", when everything is on place. It is a trick =) I did prepare all those parts, but yet they obstruct my rigging work, so ... I went this way. And I did not know that in the first place ... Inverse Rigging of the SailsYou will probably not find that term "inverse rigging" in any context of model building ... actually I invented that term for my own use. Because that is what I do: I rigg the ship in reverse order to a real ship! What does that mean? The only thing I did fix on the decks were the bitts and all belaying points for the Running Rigging. Then I start attaching threads an these points - yes, on deck! - and then I let the thread go up to the mast, through all holes needed, to the final position up in the mast. On the real ship, all ropes run DOWN to deck. In my models, I run them UP to the masts, the same way they lead. That sounds strange? Not quite ... OK You need to know the Running Rigging, but when You want to make a good model sailing ship, that study is already part of the work. Well, I went all the way, and here is the REAL entire belaying plan for You, in original Italian and English. The kit plan from Heller is wrong =)
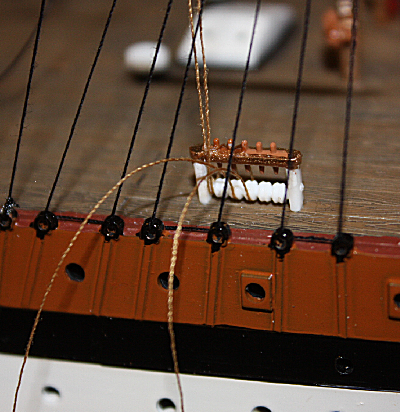
It actually makes rigging of model sailing ships easy! It would be most ineffective to take the belaying of the ropes as a final step! Even using tweezers, it would be almost impossible! In 1:150, the belaing pins are so small that You cannot knot anything on it, not even a thin sewing thred. So what did I do: I glued them (sigh) ... but in the right length prepared and on the right place. THAT is the point. Now I will show You some pictures:
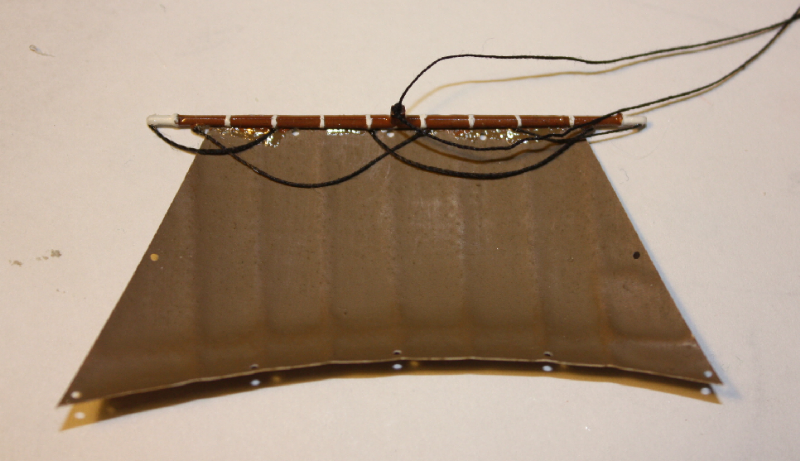
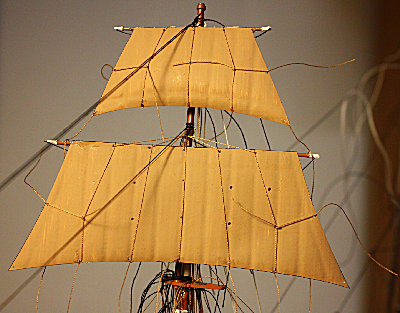
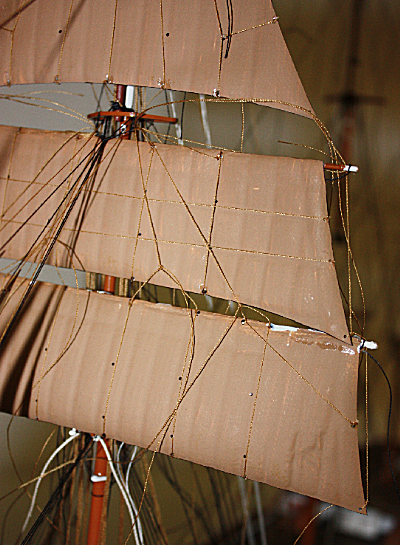
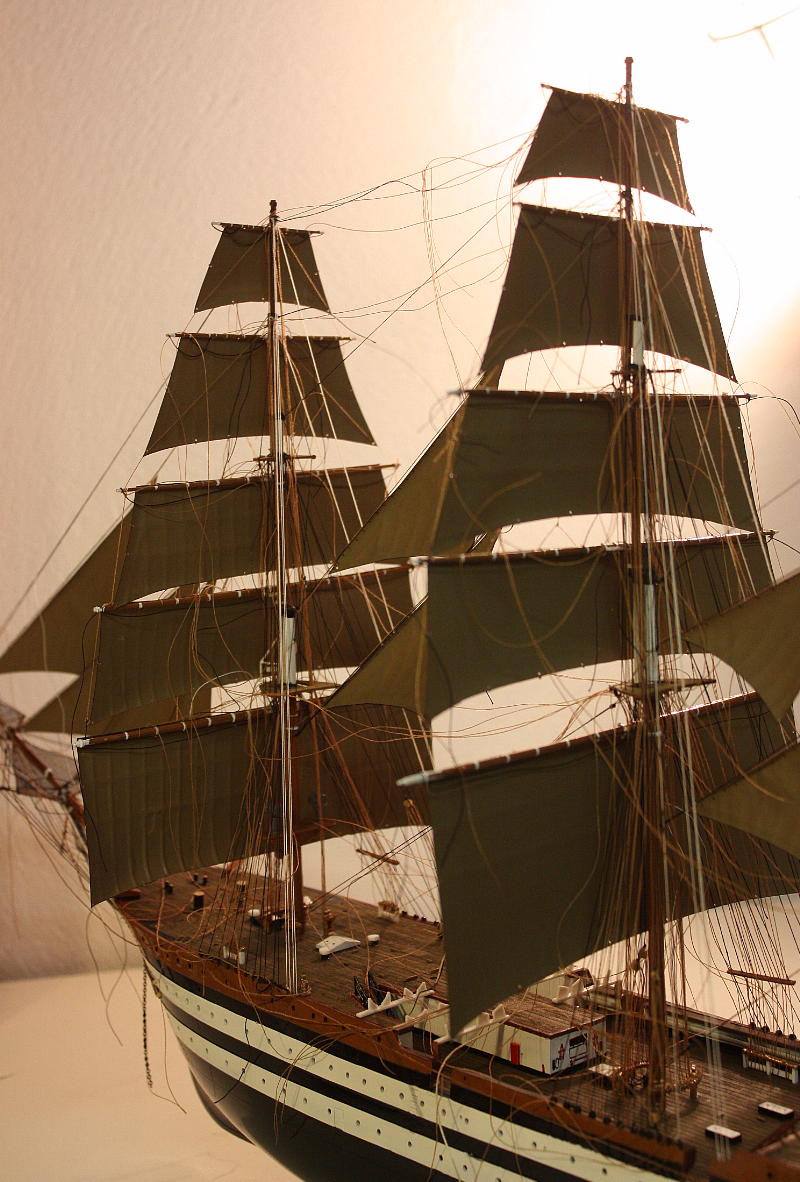
Most of the sails are square sails. Here I also work inverse: from top to bottom. I prepare each sail so that it has a "parral" thread. I used the plastic sails delivered, they are not that bad. It is easy to bore some holes where the different ropes later will "end".
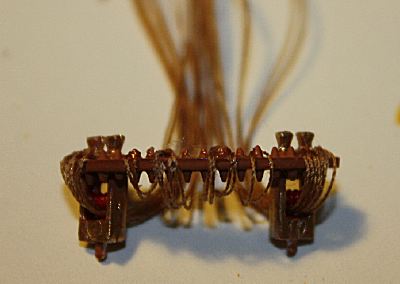
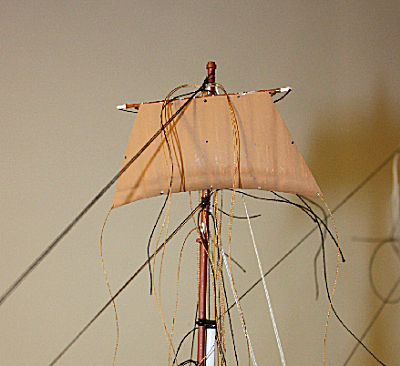
After just 4 hours only, my entire Fore Mast is almost ready!
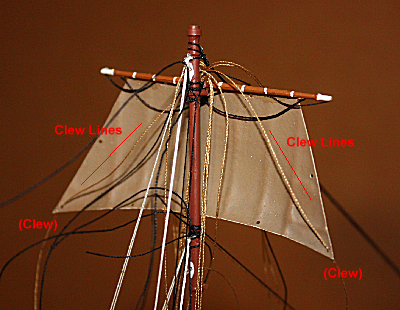
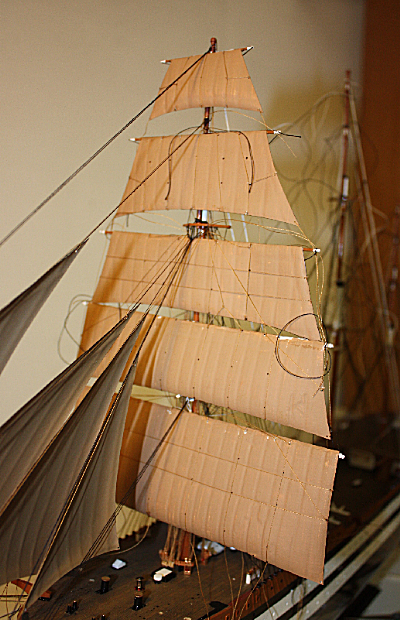
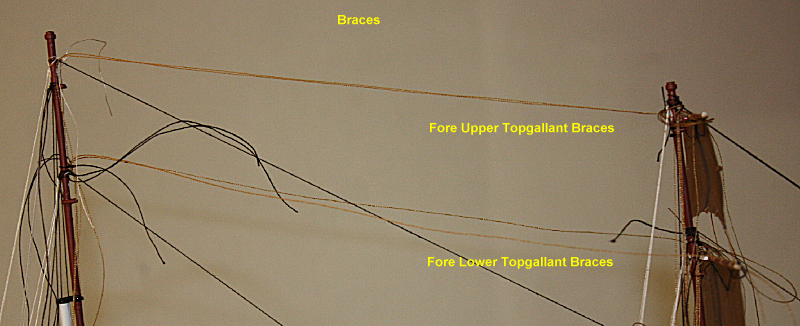
OK, I put the hours spent on research and preparation instead. That was many hours indeed! But when You know how to build it, then it is just: build! The Braces of the Fore Square sails lead aft to the main mast, and down to the rails to belay. Thus, inverse rigging is: starting at the main mast, up, and let the threads lead to the fore mast. Yet I do not fix the braces, this is one of my last steps. But it is suitable to prepare this step here.
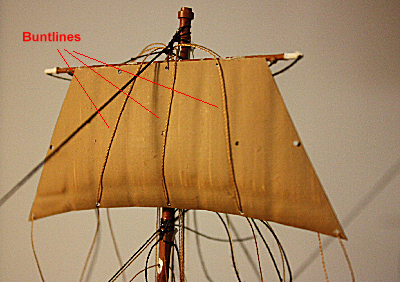
After just days later, my entire Main Mast is about ready!
Then I had a long pause for health reasons ... meanwhile we have June 2011. I will update this site when I made progress again and have more pictures. So long! |
_Main_Bitt_Details.JPG)